 Save to Pinterest
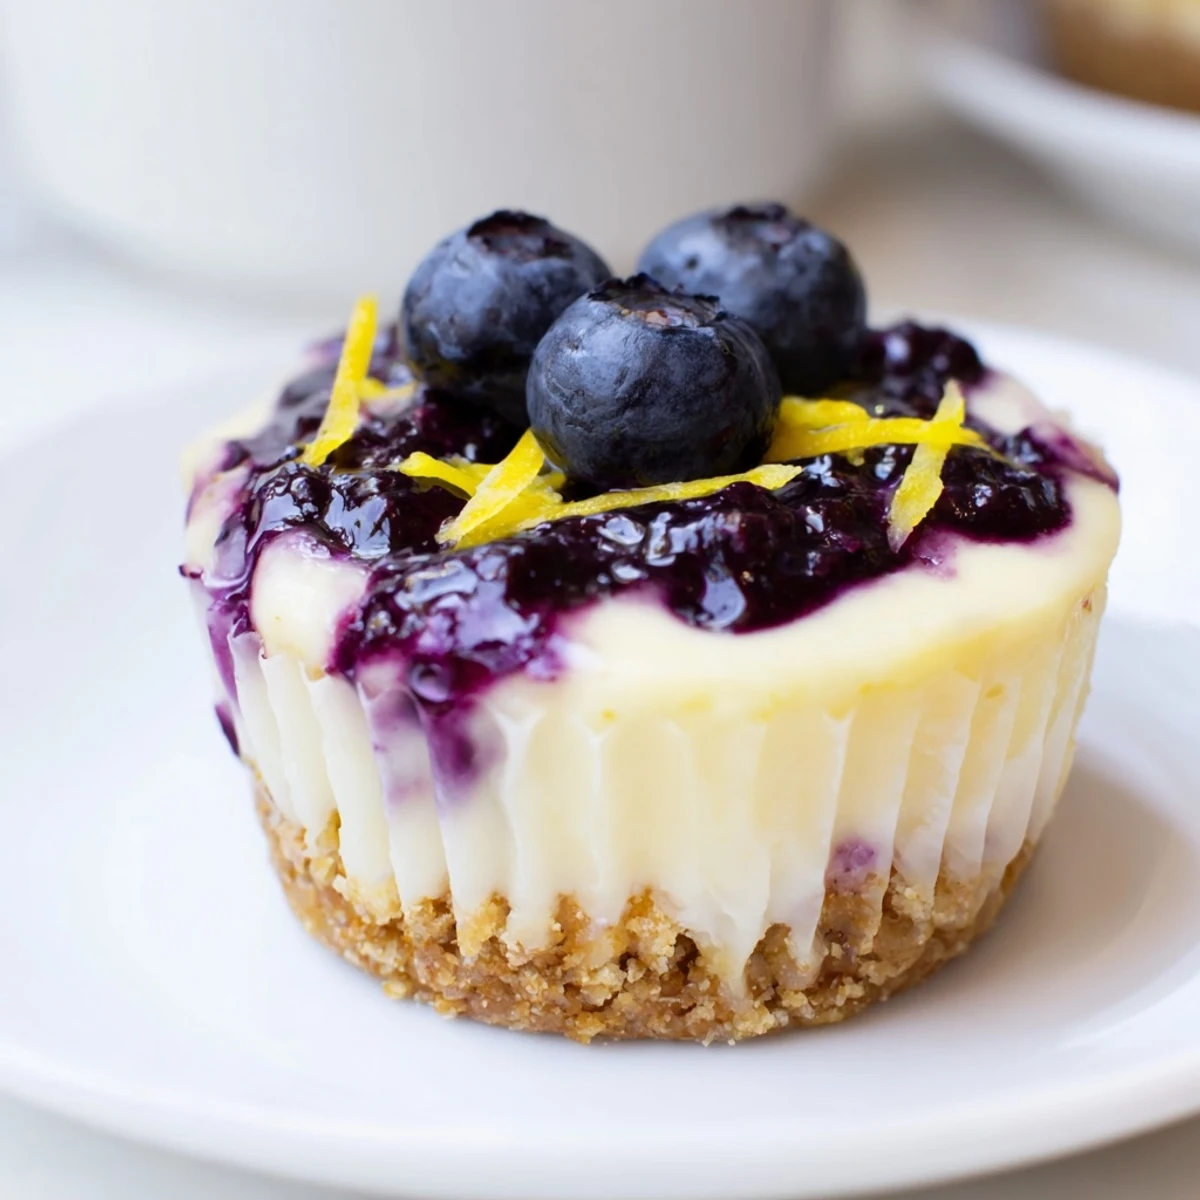
 These individual mini cheesecakes feature a buttery graham cracker crust, creamy lemon-infused filling, and swirls of homemade blueberry compote. Each handheld dessert delivers the perfect balance of tart and sweet flavors. The combination of fresh lemon juice and zest brightens the rich cream cheese base, while the warm blueberry topping adds natural sweetness and a beautiful purple swirl. With only 20 minutes of active preparation, you can create an impressive dessert that looks bakery-made but comes together easily in a standard muffin tin.
My friend Sarah brought these to a summer potluck last year and I honestly hovered near the dessert table the entire evening. Something about that tangy lemon cutting through sweet blueberries just grabs you and wont let go. By the time I worked up the nerve to ask for the recipe, she was already writing it on a napkin for three other people too.
Last weekend I made a batch for my nieces birthday and she carefully ate three, declaring each one better than the last. Watching her eyes light up at that first bite made the hour of chilling time feel like nothing. Kids apparently have no patience for refrigeration requirements, but the wait is absolutely worth it.
Ingredients
- Graham cracker crumbs: These create that classic cheesecake foundation we all know and love
- Unsalted butter: Melted butter binds the crumbs together into that perfect pressed crust
- Granulated sugar: Just enough sweetness to balance the tangy lemon in every layer
- Cream cheese: The heart of any cheesecake so make sure its properly softened to room temp
- Lemon juice and zest: Fresh lemon is non negotiable here for that bright authentic flavor
- Sour cream: This adds such a lovely tang and keeps the filling ultra creamy
- Blueberries: Fresh or frozen both work but the compote technique makes them sing
Instructions
- Preheat your space:
- Get your oven to 325°F (160°C) and line a 12 cup muffin tin with paper liners
- Build the crust:
- Mix graham cracker crumbs, sugar, and melted butter until combined and divide evenly among liners about 1 tablespoon each, pressing firmly to form a crust
- Pre bake the base:
- Bake the crusts for 5 minutes then let cool slightly while you make the filling
- Make the filling:
- Beat cream cheese and sugar until smooth and creamy then add egg, vanilla, lemon juice, and lemon zest and beat until just combined before folding in sour cream
- Fill the cups:
- Divide the cheesecake batter among crusts filling each about three quarters full
- Create the compote:
- Heat blueberries, sugar, and lemon juice over medium heat until berries burst which takes about 3 to 5 minutes then let cool slightly
- Add the swirl:
- Swirl a spoonful of cooled blueberry compote on top of each cheesecake before baking
- Bake to perfection:
- Bake cheesecakes for 15 to 17 minutes until centers are just set then cool in pan for 30 minutes before refrigerating at least 1 hour
- Garnish and serve:
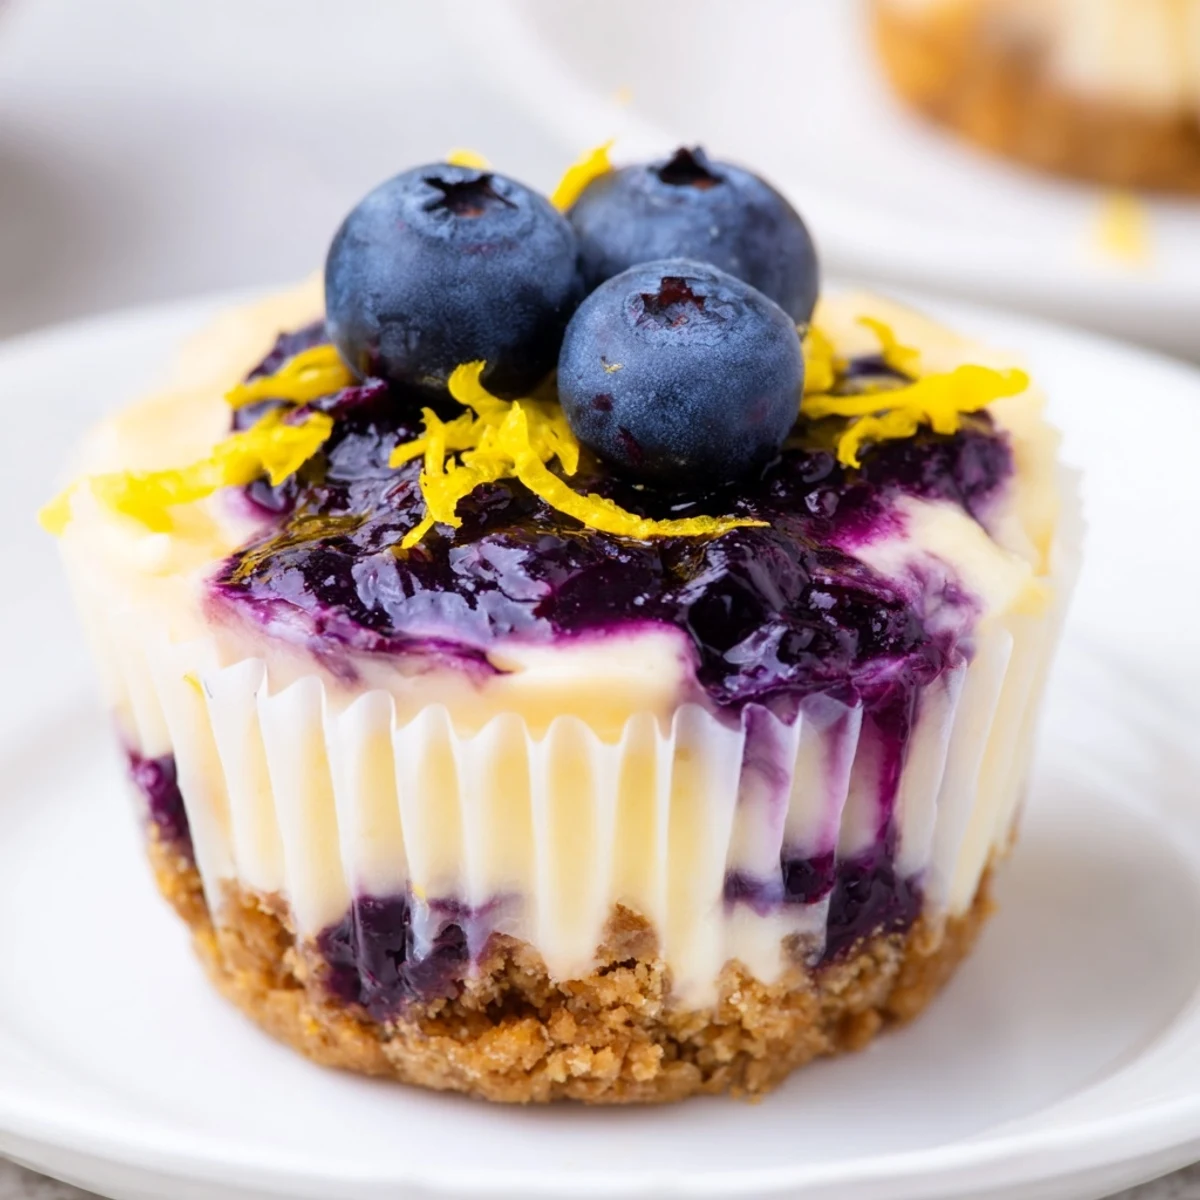
- Top with fresh blueberries and extra lemon zest if you are feeling fancy before serving
 Save to Pinterest
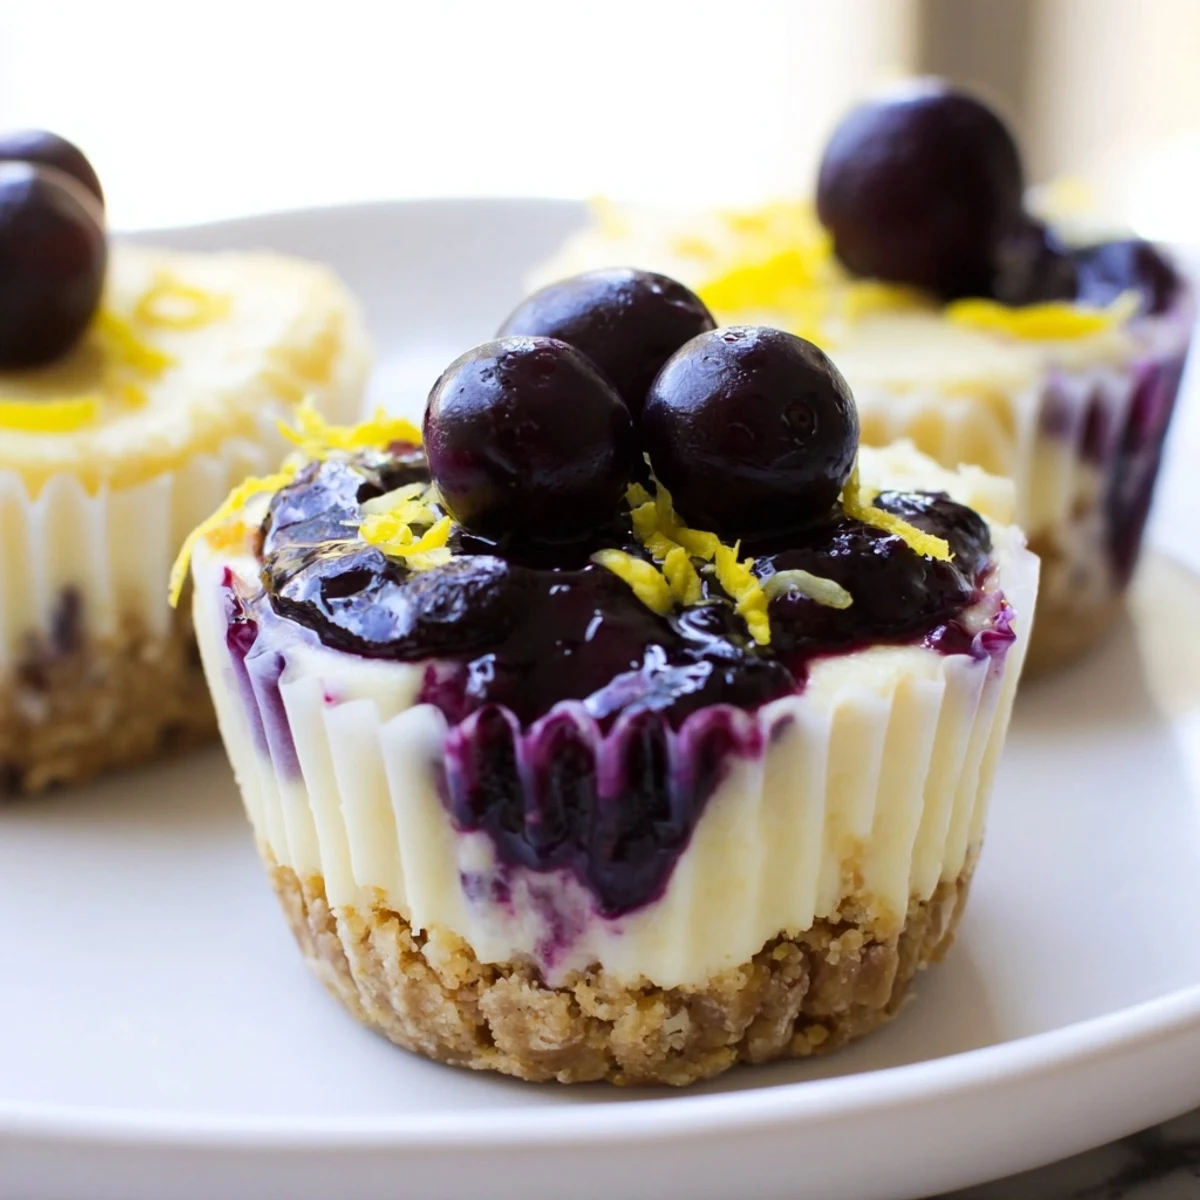
 These became my go to contribution for every gathering after my book club literally applauded when I showed up with them. Something about serving individual desserts makes people feel special and attended to. Plus no one has to awkwardly ask for a smaller slice since everyone gets exactly the same adorable portion.
Making Ahead
You can prepare these cheesecakes up to 2 days in advance and store them in the refrigerator. Just wait to add fresh blueberry garnish until right before serving so they look their best. The compote can also be made ahead and stored separately.
Serving Suggestions
These pair beautifully with a light Riesling or a cup of Earl Grey tea. The slight floral notes of either option complement the lemon perfectly without overpowering the delicate cheesecake flavor. They also work well alongside other finger desserts at parties.
Storage and Freezing
Store leftover cheesecakes in an airtight container in the refrigerator for up to 5 days. For longer storage you can freeze them without the fresh garnish for up to 2 months. Thaw overnight in the refrigerator before serving.
- Place a piece of parchment paper between layers if you need to stack them
- Let frozen cheesecakes thaw completely before adding any fresh blueberry topping
- The texture remains surprisingly good after freezing thanks to the individual size
 Save to Pinterest
 There is something so satisfying about popping that final cheesecake out of the liner and seeing that perfect swirl of blueberry. Hope these bring as much joy to your table as they have to mine.
Recipe FAQs
- → Can I make these ahead of time?
-
Yes, these mini cheesecakes actually taste better when made ahead. They can be prepared up to 3 days in advance and stored in the refrigerator. The flavors have time to meld, and the texture becomes even creamier after chilling. Keep them covered tightly to prevent absorbing other refrigerator odors.
- → How do I know when the cheesecakes are done baking?
-
The centers should be just set with a slight wiggle, similar to a set custard. They will continue to firm up as they cool. Avoid overbaking, which can cause cracking and a dry texture. If you notice the tops browning too quickly, loosely tent with foil for the last few minutes.
- → Can I use frozen blueberries for the compote?
-
Absolutely! Frozen blueberries work wonderfully for the compote and are available year-round. There's no need to thaw them first—simply add them directly to the saucepan with the sugar and lemon juice. They may take an extra minute or two to break down and release their juices compared to fresh berries.
- → What's the best way to store leftovers?
-
Store any leftover mini cheesecakes in an airtight container in the refrigerator for up to 5 days. Place parchment paper between layers if stacking to prevent sticking. For longer storage, they freeze well for up to 2 months—wrap individually in plastic wrap before freezing, then thaw overnight in the refrigerator.
- → Can I make these without a muffin tin?
-
While a muffin tin creates the most uniform shape, you can use small ramekins or silicone molds instead. Just ensure they're oven-safe. The baking time may vary slightly depending on the vessel size. Silicone liners are particularly convenient as they pop out easily and don't require paper liners.
